Installing geothermal heating is becoming increasingly popular among homeowners who want a greener, long-term way to heat their homes. The concept is simple: use the natural warmth stored beneath your garden to keep your house comfortable all year round. While it may sound high-tech, the installation process is very manageable and works for many property types – not just new builds.
One of the biggest attractions is the potential to cut heating bills significantly while reducing your carbon footprint. Once installed, maintenance is minimal, making geothermal heating a solid long-term investment.
Step 1: Pre-Installation Assessment
Every geothermal project starts with a detailed site survey. An installer visits your property to assess:
- Garden size and access
- Soil and ground conditions
- Your home’s heat demand
- Existing heating system
-
Local planning requirements
This step ensures your system will be correctly sized and efficient for years to come. Installers may also check underground utilities, water tables, and previous ground movement. In some cases, thermal conductivity tests are carried out to measure how well your ground transfers heat.
This stage is critical – poor planning leads to poor performance.
Step 2: System Design
Once the survey is complete, your installer designs a system tailored to your home. Key decisions include:
- System size (based on heat loss calculations)
-
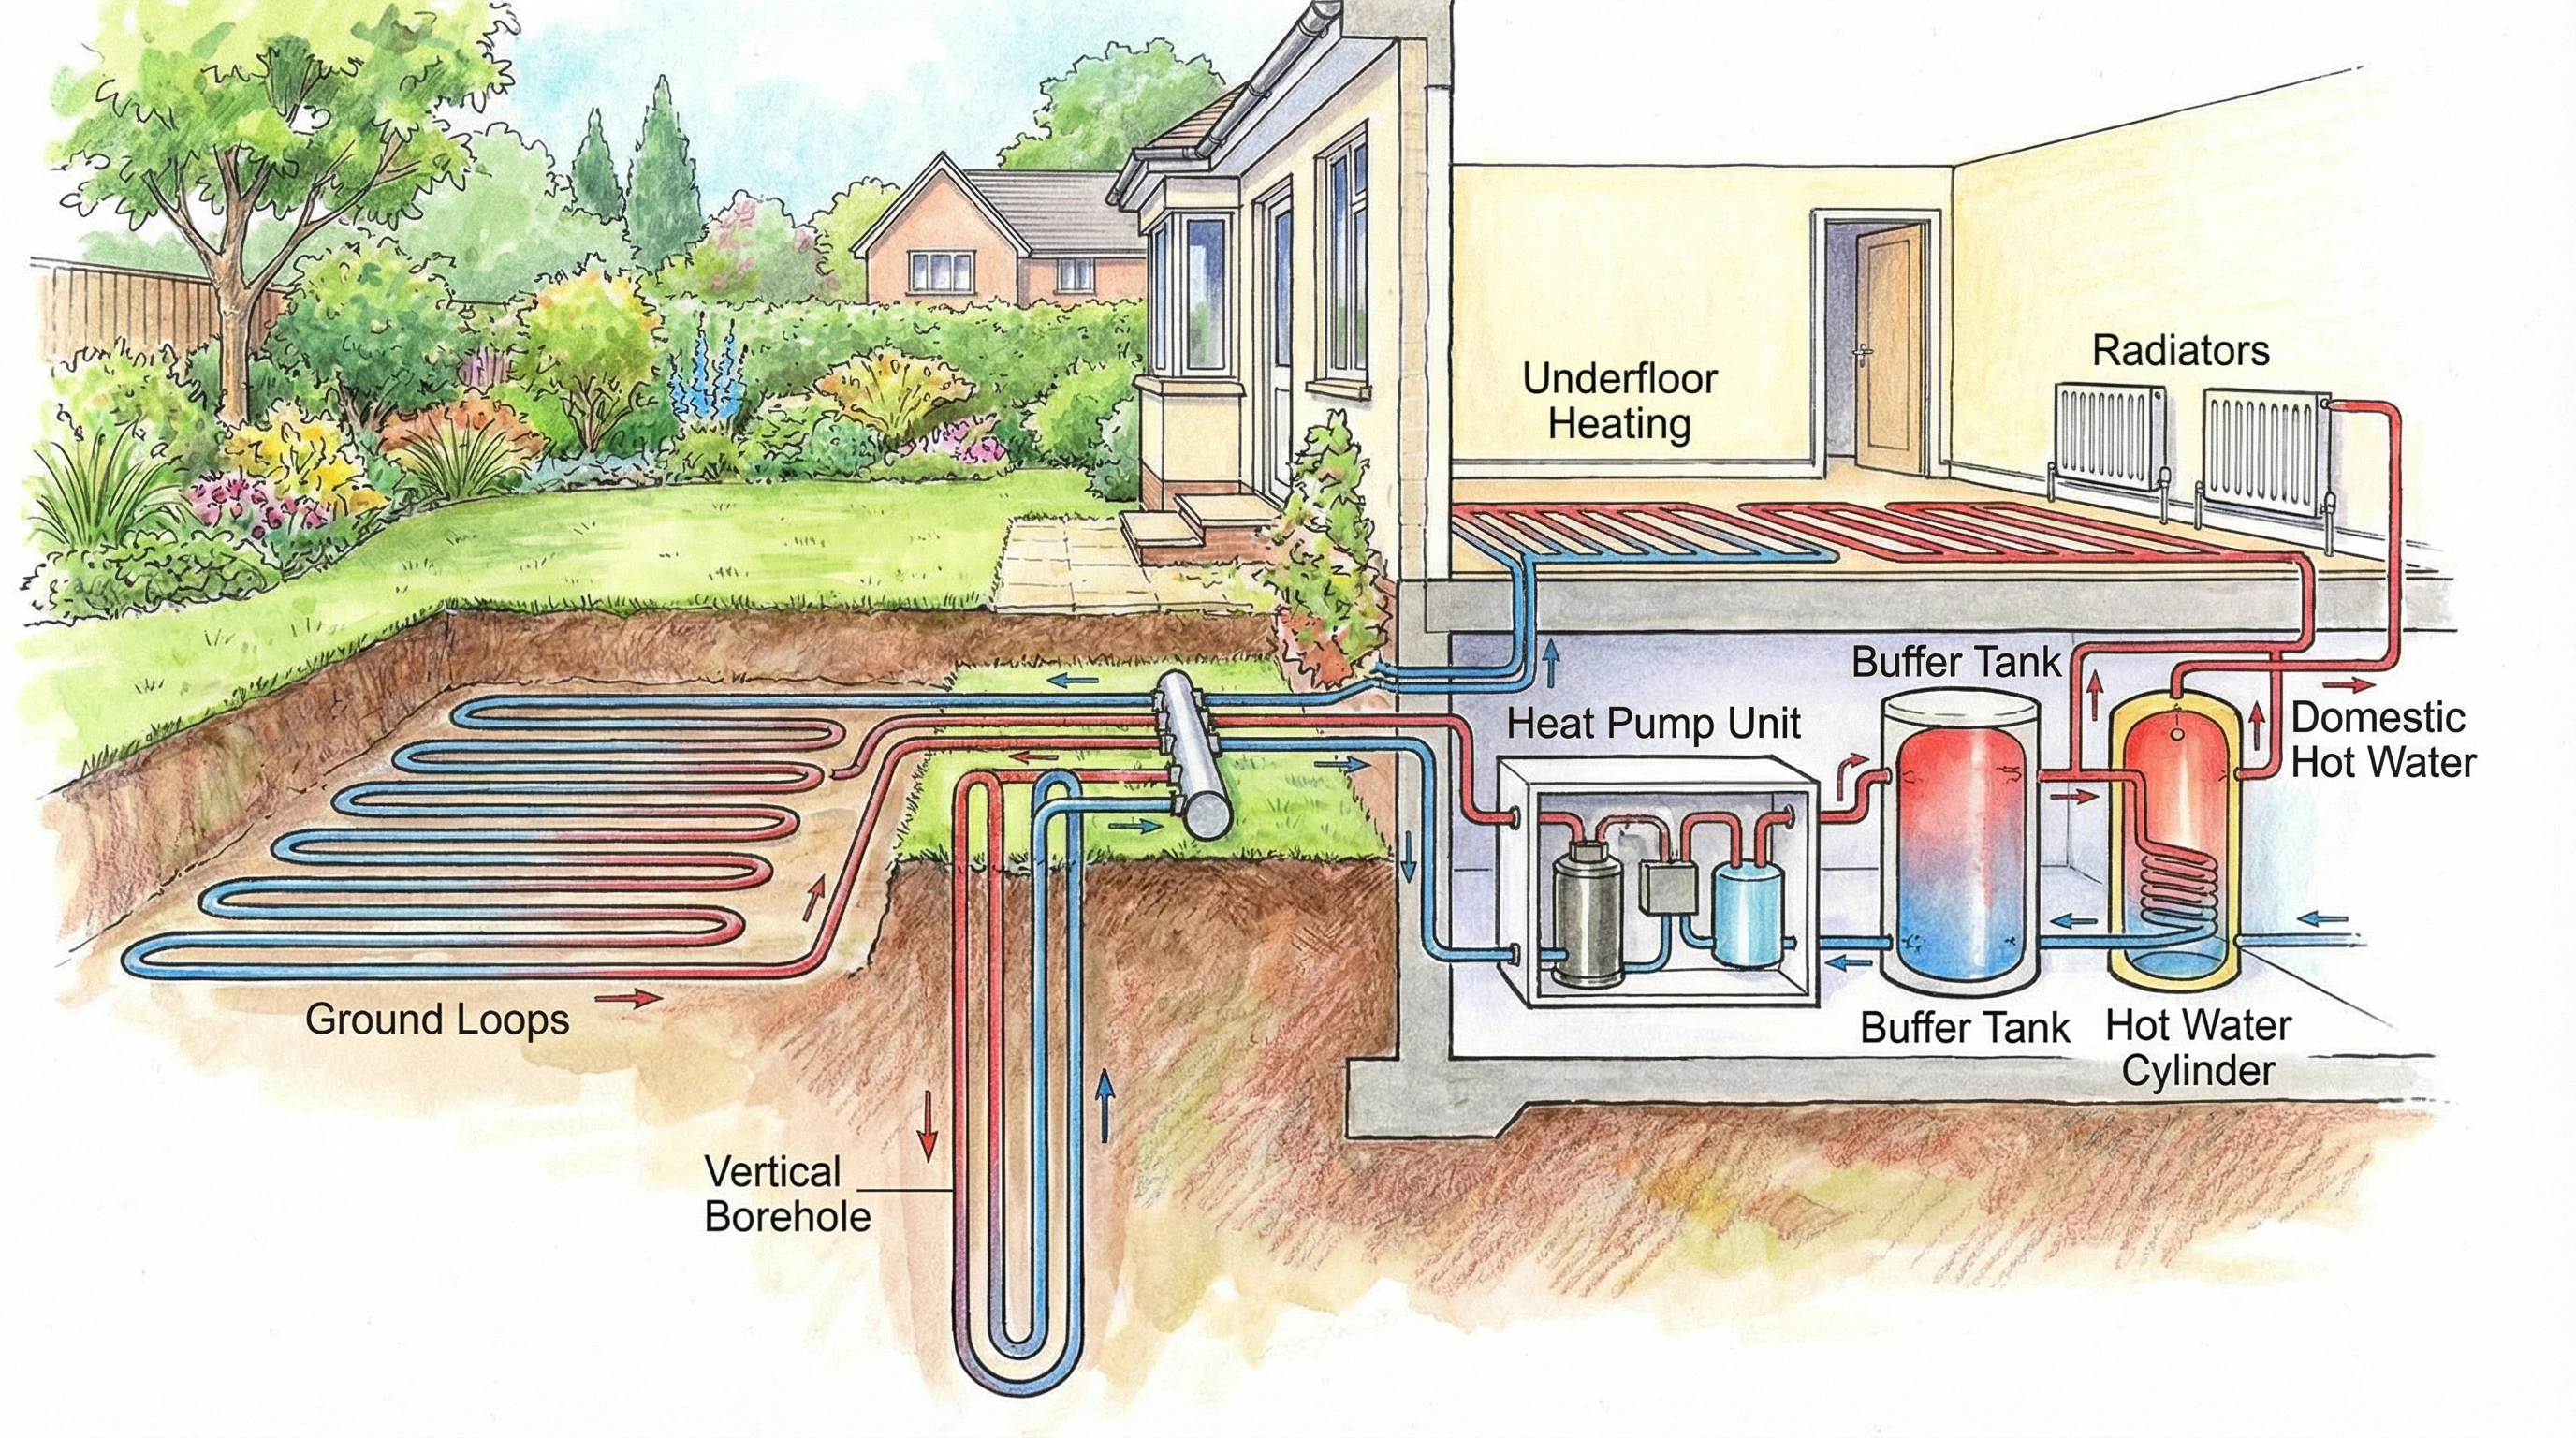
Loop type:
- Horizontal loop – shallow trenches, needs more land
- Vertical loop – deep boreholes, less space required
- Closed-loop vs open-loop systems
- Indoor unit placement
-
Smart controls and thermostat options
Insulation levels matter a lot here. A well-insulated home allows the system to work efficiently with lower running costs.
Step 3: Ground Loop Installation
This is the most disruptive part of the process.
Horizontal Loop
- Trenches dug 1–2 metres deep
- Pipes laid across the garden
-
Trenches backfilled afterwards
Vertical Loop
- Boreholes drilled up to 200 metres deep
- Used when space is limited
-
Higher cost due to specialist drilling rigs
Installation time depends on soil type, access, and system size. This stage can take anywhere from a few days to over a week.
Step 4: Indoor Installation
Once the ground loop is installed, the heat pump is fitted inside your home. This unit is roughly fridge-sized and connects to:
- Radiators
- Underfloor heating
-
Hot water cylinder
Your installer integrates the system with your existing pipework and sets up controls. Smart monitoring systems can also be added, allowing you to track performance and energy use from your phone.
Temporary heating downtime may occur, but good installers keep disruption to a minimum.
Step 5: Testing & Commissioning
Before sign-off, the system is fully tested:
- Pressure testing to check for leaks
- Control calibration
- Performance monitoring
-
User training
Installers show you how to operate your system properly so you get the best efficiency from day one. Many companies also offer follow-up support.
How Long Does Installation Take?
Most geothermal installations take 1–3 weeks, depending on:
- Loop type
- Weather conditions
- Ground difficulty
-
Indoor system upgrades
Horizontal loops are quicker, while vertical drilling adds extra time.
What Disruption Should You Expect?
Let’s be honest – this is not a tidy job:
- Lawns and flowerbeds will be disturbed
- Heavy machinery access required
- Noise during drilling
-
Temporary mess
Many homeowners use this as an opportunity to redesign their garden afterward – turning disruption into an upgrade.
Common Installation Mistakes to Avoid
- Incorrect system sizing
- Using unqualified installers
-
Skipping insulation upgrades
Always choose MCS-certified installers in the UK.
Tips to Reduce Installation Costs
- Install outside peak season
- Use government grants (Boiler Upgrade Scheme)
- Combine with renovations
- Get multiple quotes
-
Check local council incentives
Frequently Asked Questions
Can geothermal be installed in small gardens?
Yes. Vertical boreholes are ideal for tight spaces.
Do I need planning permission?
Usually no, but check with your local council.
Can I install it myself?
No. Specialist equipment and certification are required.
Final Thoughts
Geothermal heating installation is far more achievable than many people think. With the right planning and a qualified installer, the process can work for everything from rural cottages to suburban homes.
While the upfront cost is real, the long-term savings, low maintenance, and environmental benefits make geothermal heating a smart move for homeowners thinking ahead. As renewable energy continues to grow, early adopters are setting themselves up for decades of comfort and lower energy bills.